
[ad_1]
I took the featured photograph throughout my hike alongside the Panorama Path in Kodachrome State Park in Utah. I featured the situation in my earlier publish just a few weeks in the past: Secret Passage in Kodachrome
It was my very first exploration of the Kodachrome space and Panorama Path particularly. I didn’t know what to anticipate, however I knew it was a protracted (10miles/16km) large open path in 30C (90F) diploma climate at an elevation of 2000m (6500feet) above sea degree.
I made a decision to hike as gentle as attainable. I took with me Fujifilm XT2 digital camera and just one lens Fujinon 18-135mm. And I even left my tripod at a campsite as a result of I used to be not planning to hike till sundown.
The hike was exhausting due to the warmth, however I had a good time, managing to seize some fascinating pictures.
However once I reached the Secret Passage space of the hike, I noticed that I had a difficulty to unravel.
The Secret Passage is a tiny space surrounded by tall rock formations, and I wanted an extremely large angle lens to seize something significant.
The answer was to seize a number of pictures and merge them into large angle panorama in Lightroom or Photoshop throughout post-processing.
That was exactly what I did, and it labored flawlessly.

Capturing
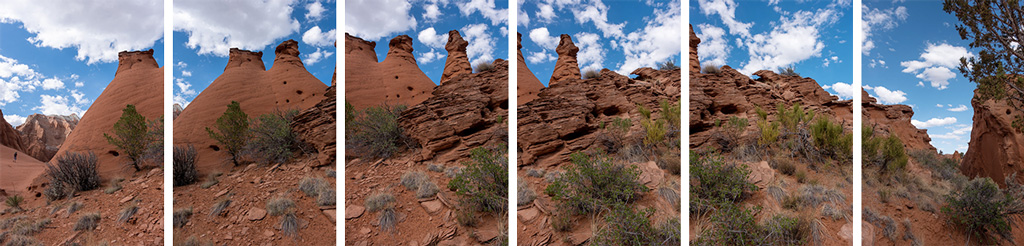
The rock formation I needed to seize had minimal area in entrance of it. After I was leaning in opposition to the alternative wall, the shot’s topic was so shut I virtually might attain it with my hand.
My authentic plan was to take 3, a most of 4 pictures, to create a large angle panorama. After just a few makes an attempt, I noticed that I want extra pictures to cowl a whole rock formation.
In the long run, it took me six vertical pictures in complete to gather info from the complete scene.
I used to be capturing handheld, making an attempt to be as nonetheless as attainable through the capturing to reduce the digital camera motion. On the similar time, even when I had a tripod with me, I might not be capable to use it due to tight area.
Earlier than taking the sequence of pictures, I made positive to lock publicity (AE-L) and autofocus (AF-L).
Modifying & Processing
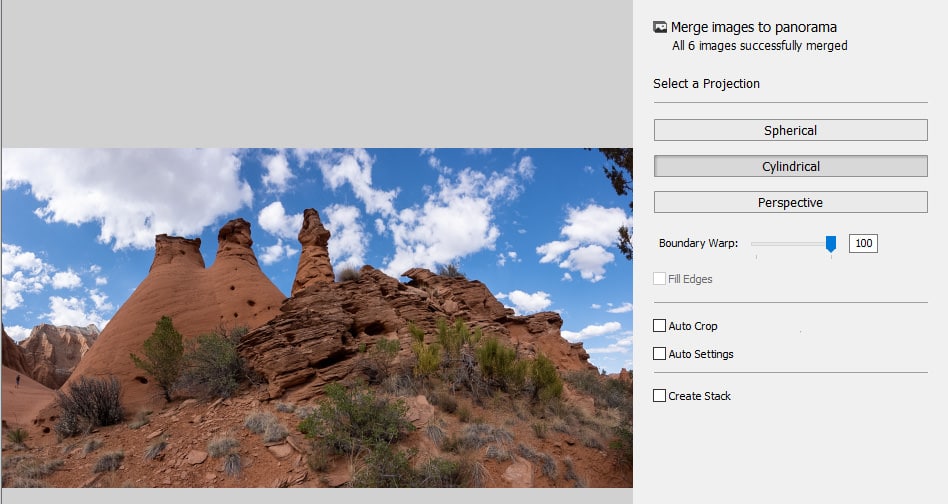
It was a multi shot panorama processing workflow.
I began processing by deciding on the complete sequence of 6 pictures and sending them to the Picture Merge module of Lightroom, selecting the Panorama choice.
Under is the screenshot of the Lightroom Panorama Merge settings:
Lightroom (80%)
Subsequent, I take advantage of the Crop Overlay device to adapt the picture to the 16×9 side ration.
To finish the Lightroom modifying, I
The Lightroom Preset Modifying System: Napa (2, 9, 13, 20, 32)
Photoshop (20%)
In Photoshop, I used the Spot Removing device to wash up the picture.
And at last, I used the Topz DeNoise plugin to scale back digital noise. That was the primary time I used the most recent model of DeNoise AI after upgrading from DeNoise 6. The latest model works in a different way in comparison with the outdated model. It doesn’t solely cut back the noise however sharpens the picture as properly.
After I’m snug with the brand new model, I’ll replace my evaluate of Topaz plugins.
Earlier than & After Transformation

[ad_2]