
[ad_1]
The Capito Reef Nationwide Park is the least visited nationwide park in Utah. The principle purpose for such low recognition is its remoteness. It’s removed from main Las Vegas, Phoenix, and Denver worldwide airports. However within the final 3-4 years, it has turn into my favourite place to discover throughout Nationwide Parks street journeys.
The Capitol Reef space that draws me essentially the most is the Cathedral Vally, essentially the most distant and secluded space of the park.
There aren’t any paved roads within the Cathedral Vally, and also you want a high-clearance automobile to discover it. Plus, to enter the valley, you should ford the native river. Did I point out that the clay roads of the valley turn into unpassable when it’s moist?
There are many beautiful spots within the valley, and I featured a few of them already on my weblog:
- Cathedral Valley Aerial View (Utah)
- Decrease South Desert Outlook (Utah)
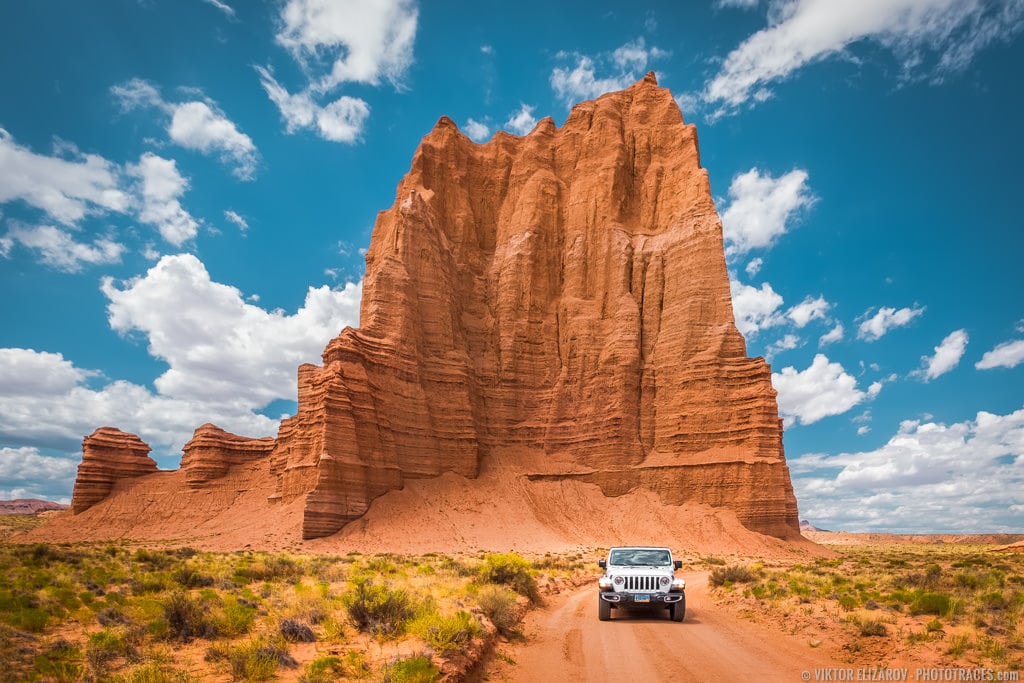
And in the present day, I’m excited to preset to you the Temple of the Solar rock formation situated deep within the Cathedral Valley desert space. Truly, it’s a binary rock formation, one known as the Temple of the Moon and one other Temple of the Solar. The latter is larger and prettier.
My preliminary intention was to seize each temples in a single shot, however I by no means managed to attain compelling composition with each rock formations. So I made a decision to current them individually.
Right here is the Temple of the Solar. Make certain to carry Capitol Reef Nationwide Park Map with you to seek out the temples.
Taking pictures
The Temple of the Solar is surrounded by a desert space of the Cathedral Valley. I knew upfront that my composition’s essential object of curiosity could be the Temple, however I wanted to put one other object of curiosity within the foreground or middleground.
Please learn my devoted tutorial right here: The Idea of Foreground, Middleground, and Background in Panorama Pictures.
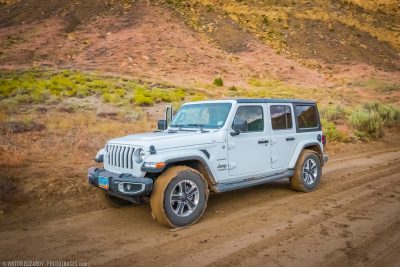
Since I struggled to seek out the secondary pure component for my composition, I made a decision to make use of my Jeep as such a component. Plus, it created one other stage of distinction between the pure and artifical compositional components.
The following problem was perspective distortion.
Everyone knows that to keep away from perspective distortion, we have to have the digital camera sensor aircraft perpendicular to the earth’s plain. However in my case, it was not possible. If I stored my digital camera straight, I couldn’t match the big rock into the body, even on the widest focal size of 10mm.
The one means for me to compose the shot was to tilt the digital camera upward. This leads to an impact often called “converging verticals,” the place completely parallel strains in actual life seem to converge within the {photograph}. The impact is often known as “leaning buildings” when the buildings seem to lean or fall backward.
Since I couldn’t seize the scene distortion-free in-camera, I knew I would wish to repair it later in Lightroom.
My article right here discusses tips on how to cope with perspective distortion: Tips on how to Straighten a Picture in Lightroom.
I used the tripod however didn’t must bracket my pictures. After checking the histogram in my Fuji XT2, I may see that capturing all the vary of sunshine in a single shot was doable.
Modifying & Processing
To course of the featured photograph, I used my model new Journey Professional Equipment workflow.
The Journey Professional Equipment is a group of Lightroom presets, profiles, and enhancing changes that assist you to edit photographs quick with out touching this system’s enhancing instruments. In complete, the Journey Professional Equipment has 7 elements.
To be taught extra concerning the Journey Professional Equipment’s elements, verify right here.

Lightroom (80%) – 20min
It was a single RAW processing workflow.
Step #1 – Fixing Perspective Distortion
Step one was to repair perspective distortion.
I exploit the Remodel Panel’s sliders, the Vertical, and the Facet to repair the “leaning buildings” impact.

Step #2 – Composition Enchancment
I used the Crop Overlay instrument to straighten the photograph, ensuring the horizon was straight.
I stored the unique side ratio of three:2, however I made composition tighter.

Step #2 – Lightroom Speedy Modifying
Subsequent, I moved to my normal preset based mostly workflow I name Lightroom Speedy Modifying.
First, I utilized the 01. Napa preset from the Journey Professional Equipment – Landscapes Assortment to the unique picture.
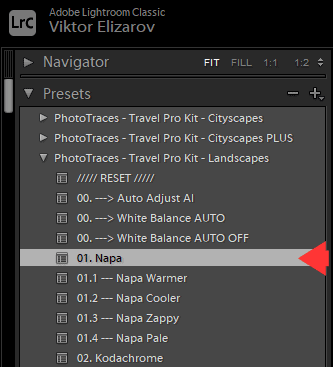
I favored the impact the preset produced, however I noticed it was too robust.
I jumped to my opacity preset assortment Journey Professional Equipment – Landscapes Assortment PLUS and utilized the Napa preset at 80% power.

Subsequent, I opened the TOOLKIT and utilized the next changes:
09. Open Shadows +++
12. Distinction ++
20. Vibrance ++
34. Sky Impartial 0
45. Midtone Distinction ++++
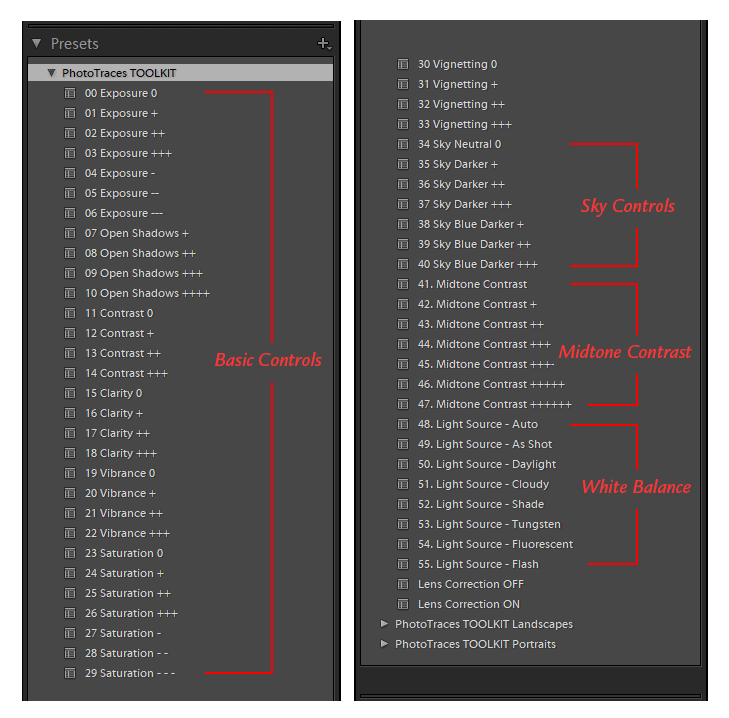
The Modifying Components: Napa 80% (9, 12, 20, 34, 45)
Photoshop (20%) – 5min
Step #4 – Cleansing
I didn’t must do a lot in Photoshop. All I had t do is to take away distracting particles from the street with the assistance of the Spot Removing instrument.
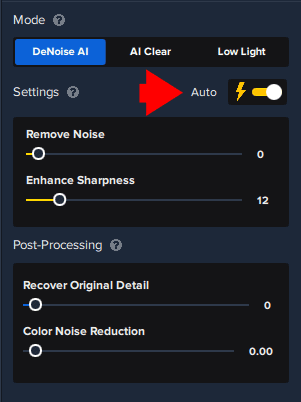
Step #5 – Noise Removing & Sharpening
Since I took the photograph at a base ISO of 200, it didn’t have extreme digital noise. The aim was to take away the noise from the sky’s space and apply gentle sharpening to the rock formation and foreground components.
Usually, you want 2 totally different instruments to take away noise and one other to extend sharpness, however with the discharge of a model new Topaz DeNoise plugin, you may full each duties in a single step. I used the AUTO settings, and the plugin lowered the noise and elevated sharpness in a single step. Priceless.
To be taught extra about how I exploit Topuz Plugins in my images verify right here: Topaz Software program Assessment – How I exploit Topaz Plugins
Earlier than & After Transformation
[ad_2]