
[ad_1]
Typically it feels that spring season doesn’t exist in Montreal. The winter lasts till late April and even early Could, after which in a few weeks, it transforms into summer season. However not this 12 months.
On the primary calendar day of spring, it appeared and felt that winter was over.
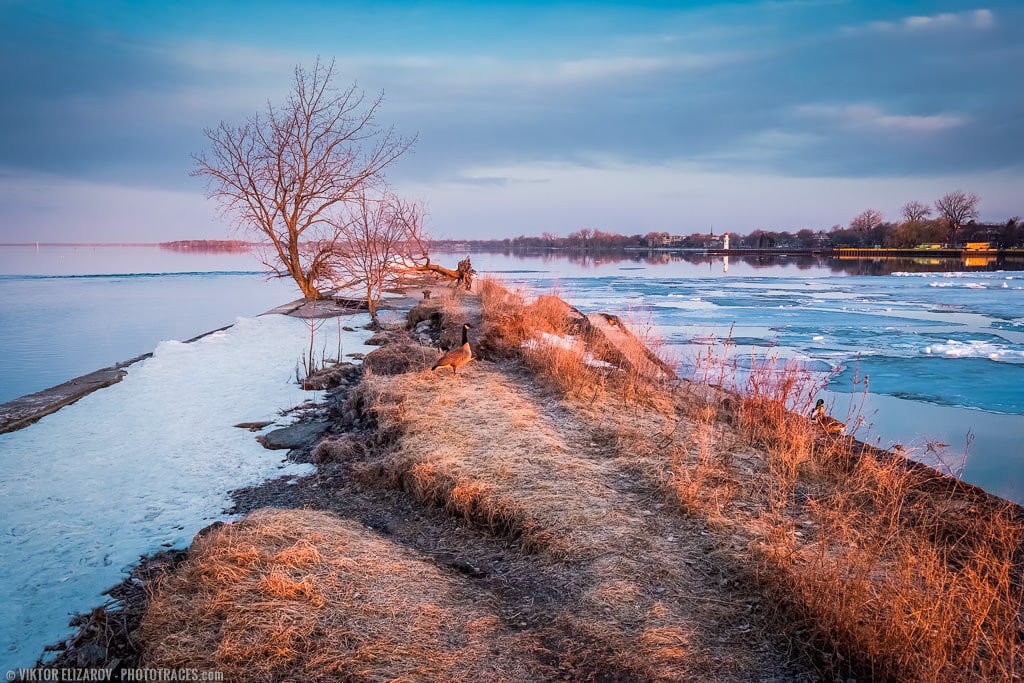
After attempting to find а good dawn for 4 days, I used to be lastly rewarded with the proper morning. The air was clear; the clouds had been vivid and light-weight, serving to diffuse the daylight, and there was no wind. The colour distinction between heat vegetation and funky ice within the river was gorgeous.
It was simply excellent.
Plus, I noticed 2 pairs of birds, geese and geese, hanging in final 12 months’s grass. They had been prepared for a mating season. It was one other signal that the spring is right here, and I needed to seize its ambiance.
Capturing
Once I go photograph attempting to find good mild at sundown or dawn, I at all times deliver the tripod. It’s anticipated to face troublesome lighting circumstances early within the morning or later within the night. However, for some motive, this time, I left my trusted Fesol tripod within the automobile.
I had no selection however to make use of increased ISO values. I used to be taking pictures in aperture precedence mode, as I do in 90% of instances. And I set the ISO dial to A, which signifies AUTO ISO.
When taking pictures handheld, I typically use AUTO ISO mode. It lets the digicam enhance ISO worth robotically to compensate for lack of sunshine with out utilizing the shutter velocity slower than preconfigured 1/125s worth.
I ended up with an ISO worth of 1250, which is excessive. However based mostly on my expertise taking pictures with Fujifilm XT2 for a very long time, I knew that its APS-C sensor may deal with it, and I can take away extra of digital noise throughout post-processing.
I additionally deliberately overexposed the picture by 1/3-1/2 stops. I exploit the “publicity to the best” approach, which originated from the idea that to get the very best picture high quality from any digital sensor, you want to saturate it with mild however with out clipping the highlights (with out introducing pure whites).
To realize sensor saturation with mild, I exploit the histogram and publicity compensation functionalities on my digicam. I level the digicam in the direction of the scene I intend to seize and utilizing the AE-L button, I lock the publicity. Subsequent, I activate the histogram contained in the EVF. Lastly, I exploit publicity compensation to spice up the publicity. I watch the histogram to stop coloration channels from clipping.
Take a look at the histogram of the featured unprocessed RAW picture.

Enhancing & Processing
Final week, I utterly rebuilt my premium Spring Colours preset assortment, which is a part of the 4 Seasons Assortment Set.
To study extra concerning the up to date Spring Colours assortment’s foremost elements, verify the assistance article right here.
Please word, when you bought the Spring Colours assortment or 4 Classes assortment set beforehand, you’ll be able to obtain the upgraded model at no cost by logging into the members’ space.
At present, I wish to present you ways I exploit the brand new Spring Colours preset assortment in my workflow.
It was a single RAW picture processing workflow.
Lightroom – 15min
Step #1 – Cropping
I at all times begin my Lightroom enhancing workflow with the Crop Overlay device. I analyze the picture and see if I can enhance composition by cropping it tighter or altering the facet ratio.
This time I used to be proud of the unique, straight out of digicam framing.
On the identical time, I used to be not too keen on the distraction within the left nook of the body within the type of a small tree.
After making an attempt to crop it out, I noticed it was not potential with out ruining the composition. The one answer was to take away it later in Photoshop.
Step #2 – Lightroom Fast Enhancing
Subsequent, I moved to my normal preset based mostly workflow I name Lightroom Fast Enhancing.
I opened the Spring Colours preset assortment and began to experiment with completely different appears, looking for essentially the most interesting one.
The Spring Colours preset assortment was designed to recuperate the colours and textures in colorless and infrequently boring spring landscapes.
I made a decision to make use of the Spring preset. I create it to make use of with panorama photos that includes a wide-open sky.
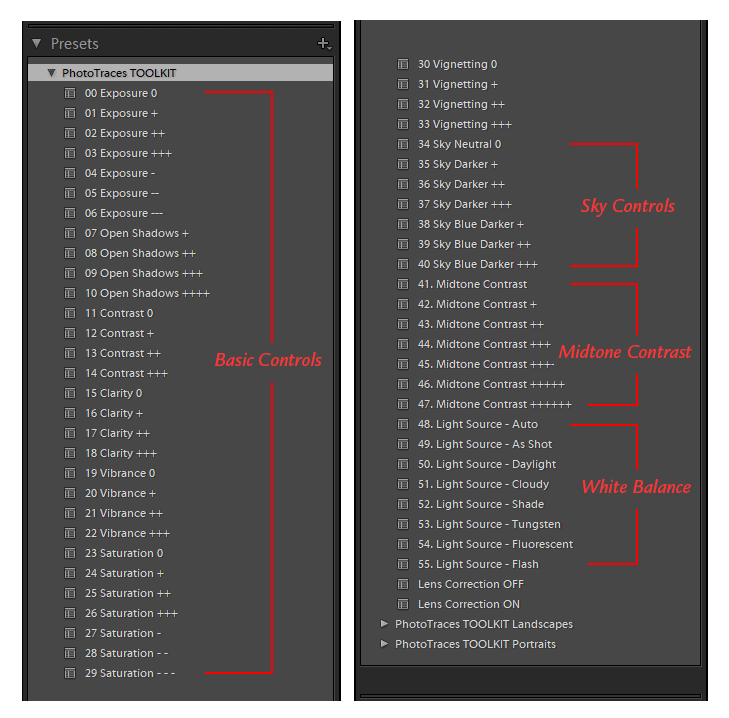
Beneath, you will discover the screenshot of the brand new, up to date construction of the Spring Colours preset assortment.

Now, every preset has 4 extra variations: Hotter, Cooler, Zappy, and Pale.
For instance, I used the Spring Hotter variation for my enhancing. Once I chosen the Spring Hotter preset, I received an extra enhancing possibility contained in the BASIC panel.
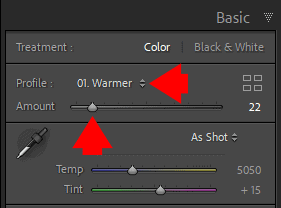
With the assistance of the AMOUNT slider, you’ll be able to dial up or dial down the “warming” impact.
In my case, I used Spring Hotter at 28%.
Moreover producing inventive type, the Level Lobos preset lets you steadiness the publicity.
Step #3 – TOOLKIT Changes
The TOOLKIT is the gathering of adjustment presets that permit fine-tuning of a photograph with out altering the type or creating any particular look. The adjustment presets show you how to to customise the look produced by the SPRING preset.
Be aware: Ensure you upgraded the TOOLKIT to the most recent model (TOOLKIT v2).
Subsequent, I opened the TOOLKIT v2 and utilized the next changes:
04. Publicity –
09. Open Shadows+++
32. Vignetting ++
44. Midtone Distinction +++++
I used the Publicity and Open Shadows changes to steadiness the publicity. The Midtone Distinction adjustment preset was used to spice up the distinction within the photograph with out affecting the darkest and brightest tones.
Photoshop – 20min
Step #5 – Cleansing
I attempt to simplify each photograph I edit by eradicating distracting parts similar to electrical wires, fences, and particles. This time I had a tougher process. I wanted to take away a reasonably large factor, the tree.
I used the mix of the Clone Stamp and Spot Therapeutic Brush instruments to take away the distracting tree and it took me not less than 15min.
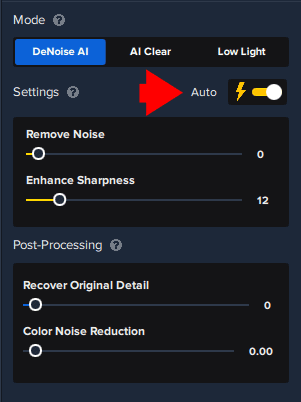
Step #6 – Noise Removing & Sharpening
Due to using a excessive ISO worth (1250), the sensor produced loads of digital noise and the purpose was to take away or not less than reduce it.

Sometimes, you want 2 completely different instruments to take away noise and one other to extend sharpness, however with the discharge of a model new Topaz DeNoise plugin, you’ll be able to full each duties in a single step. I used the AUTO settings, and the plugin lowered the noise and elevated sharpness in a single step. Priceless.
To study extra about how I exploit Topuz Plugins in my images verify right here: Topaz Software program Overview – How I exploit Topaz Plugins
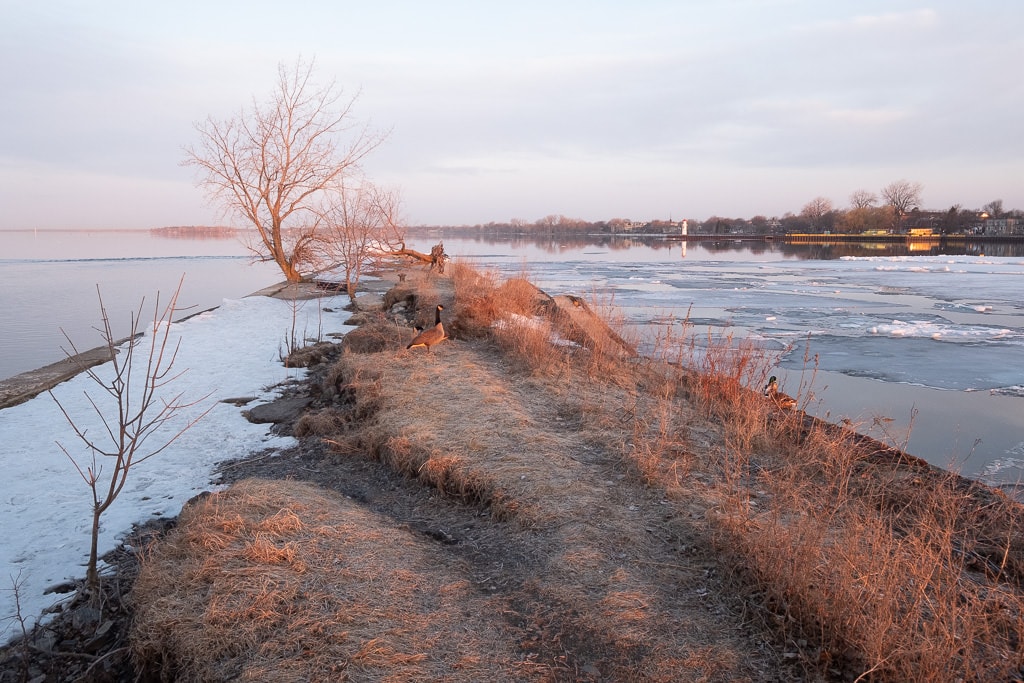
Earlier than & After Transformation

“Spring Colours”
Lightroom Preset Assortment
Lightroom workflow bundle consists of Look Presets, Adjustment Presets, Opacity Presets, Reset Presets, Enhancing Formulation.

“4 Seasons”
Lightroom Preset Bundle
Lightroom workflow bundle consists of Look Presets, Adjustment Presets, Opacity Presets, Reset Presets, Enhancing Formulation.
[ad_2]